Soft & Sweet Peach Side Table Makeover
I have the sweetest makeover to share with you today. My Soft & Sweet Peach Side Table Makeover with the cutest little birdie knob one ever did see. It didn't look much when I pulled it home from the op shop. I don't know what drew me to the cabinet in the first place but when I laid my eyes on it I knew I had to take it home and give it a makeover. There was a touch of whimsy about it and I could see some kind of seriously cute knob on the door and it painted in a fun colour. With a $5 price tag, I couldn't walk past it especially when I had such a firm vision of what I wanted to do with it. Plus I felt sorry for it because whoever put the big ugly Rudolph the red nose knob on it had no vision at all.


It was a really sturdy and well built little cupboard but a little musty on the inside and it had this weird sticky paper stuck on the shelves on the inside. Thankfully it was pretty easy to remove in preparation for painting it. When I buy a piece of furniture I make sure it's sturdy, there is no cracks, rot or broken sections and whatever prep I need to do on it doesn't require hours of labour. Such as removing the sticky paper on the inside. If that was in a terrible state I probably would have left it alone. The first step in prepping any piece of furniture is to dismantle it and break it down. I removed the doors and hinges, knobs, legs and the paper on the inside of the cupboard. I always make sure to set the hinges aside in a small bottle or ziploc bag so that I can easily find it again.

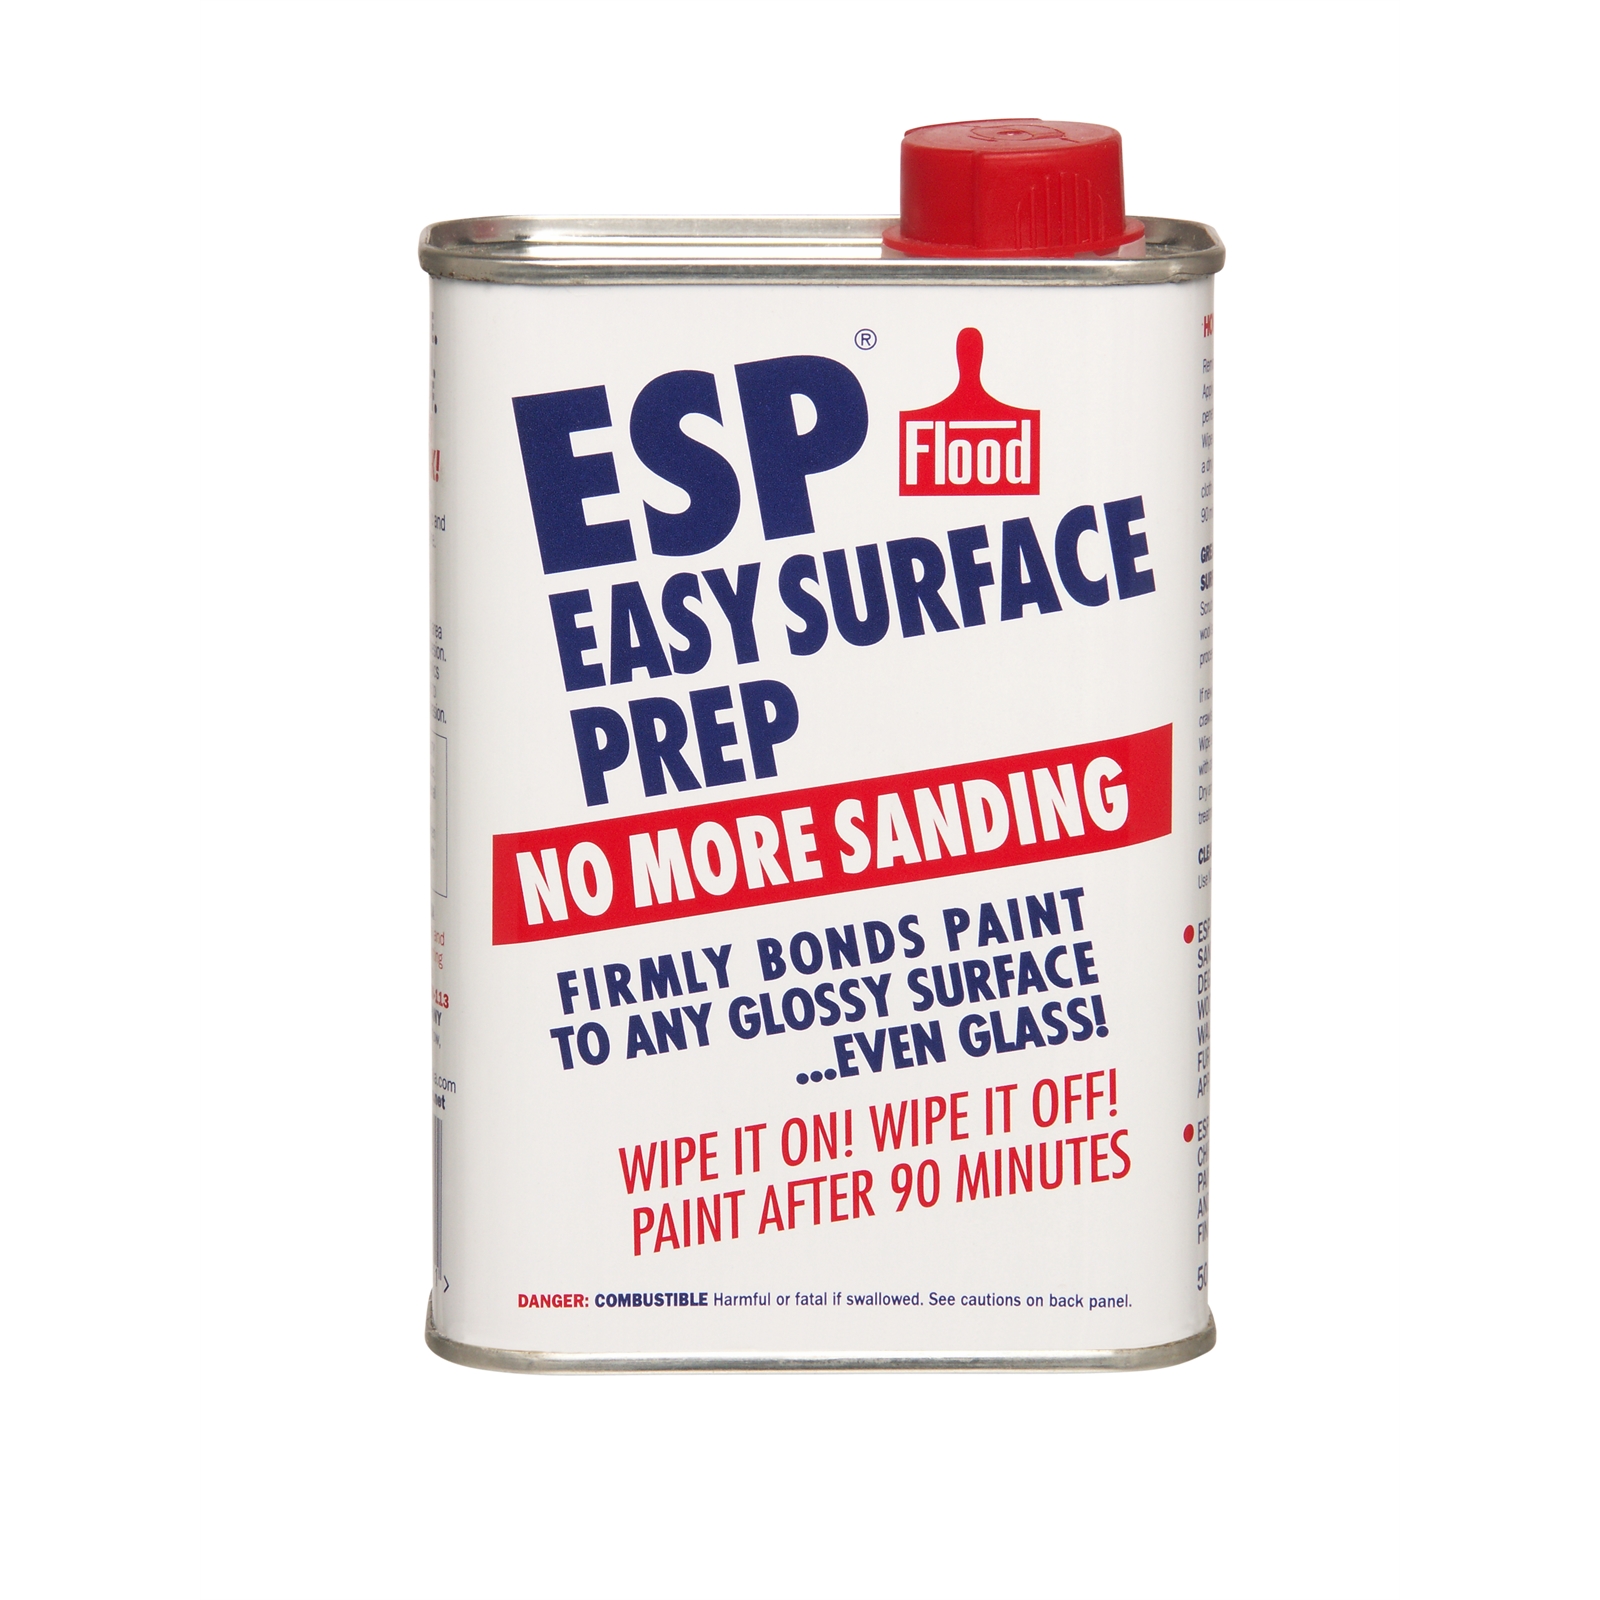
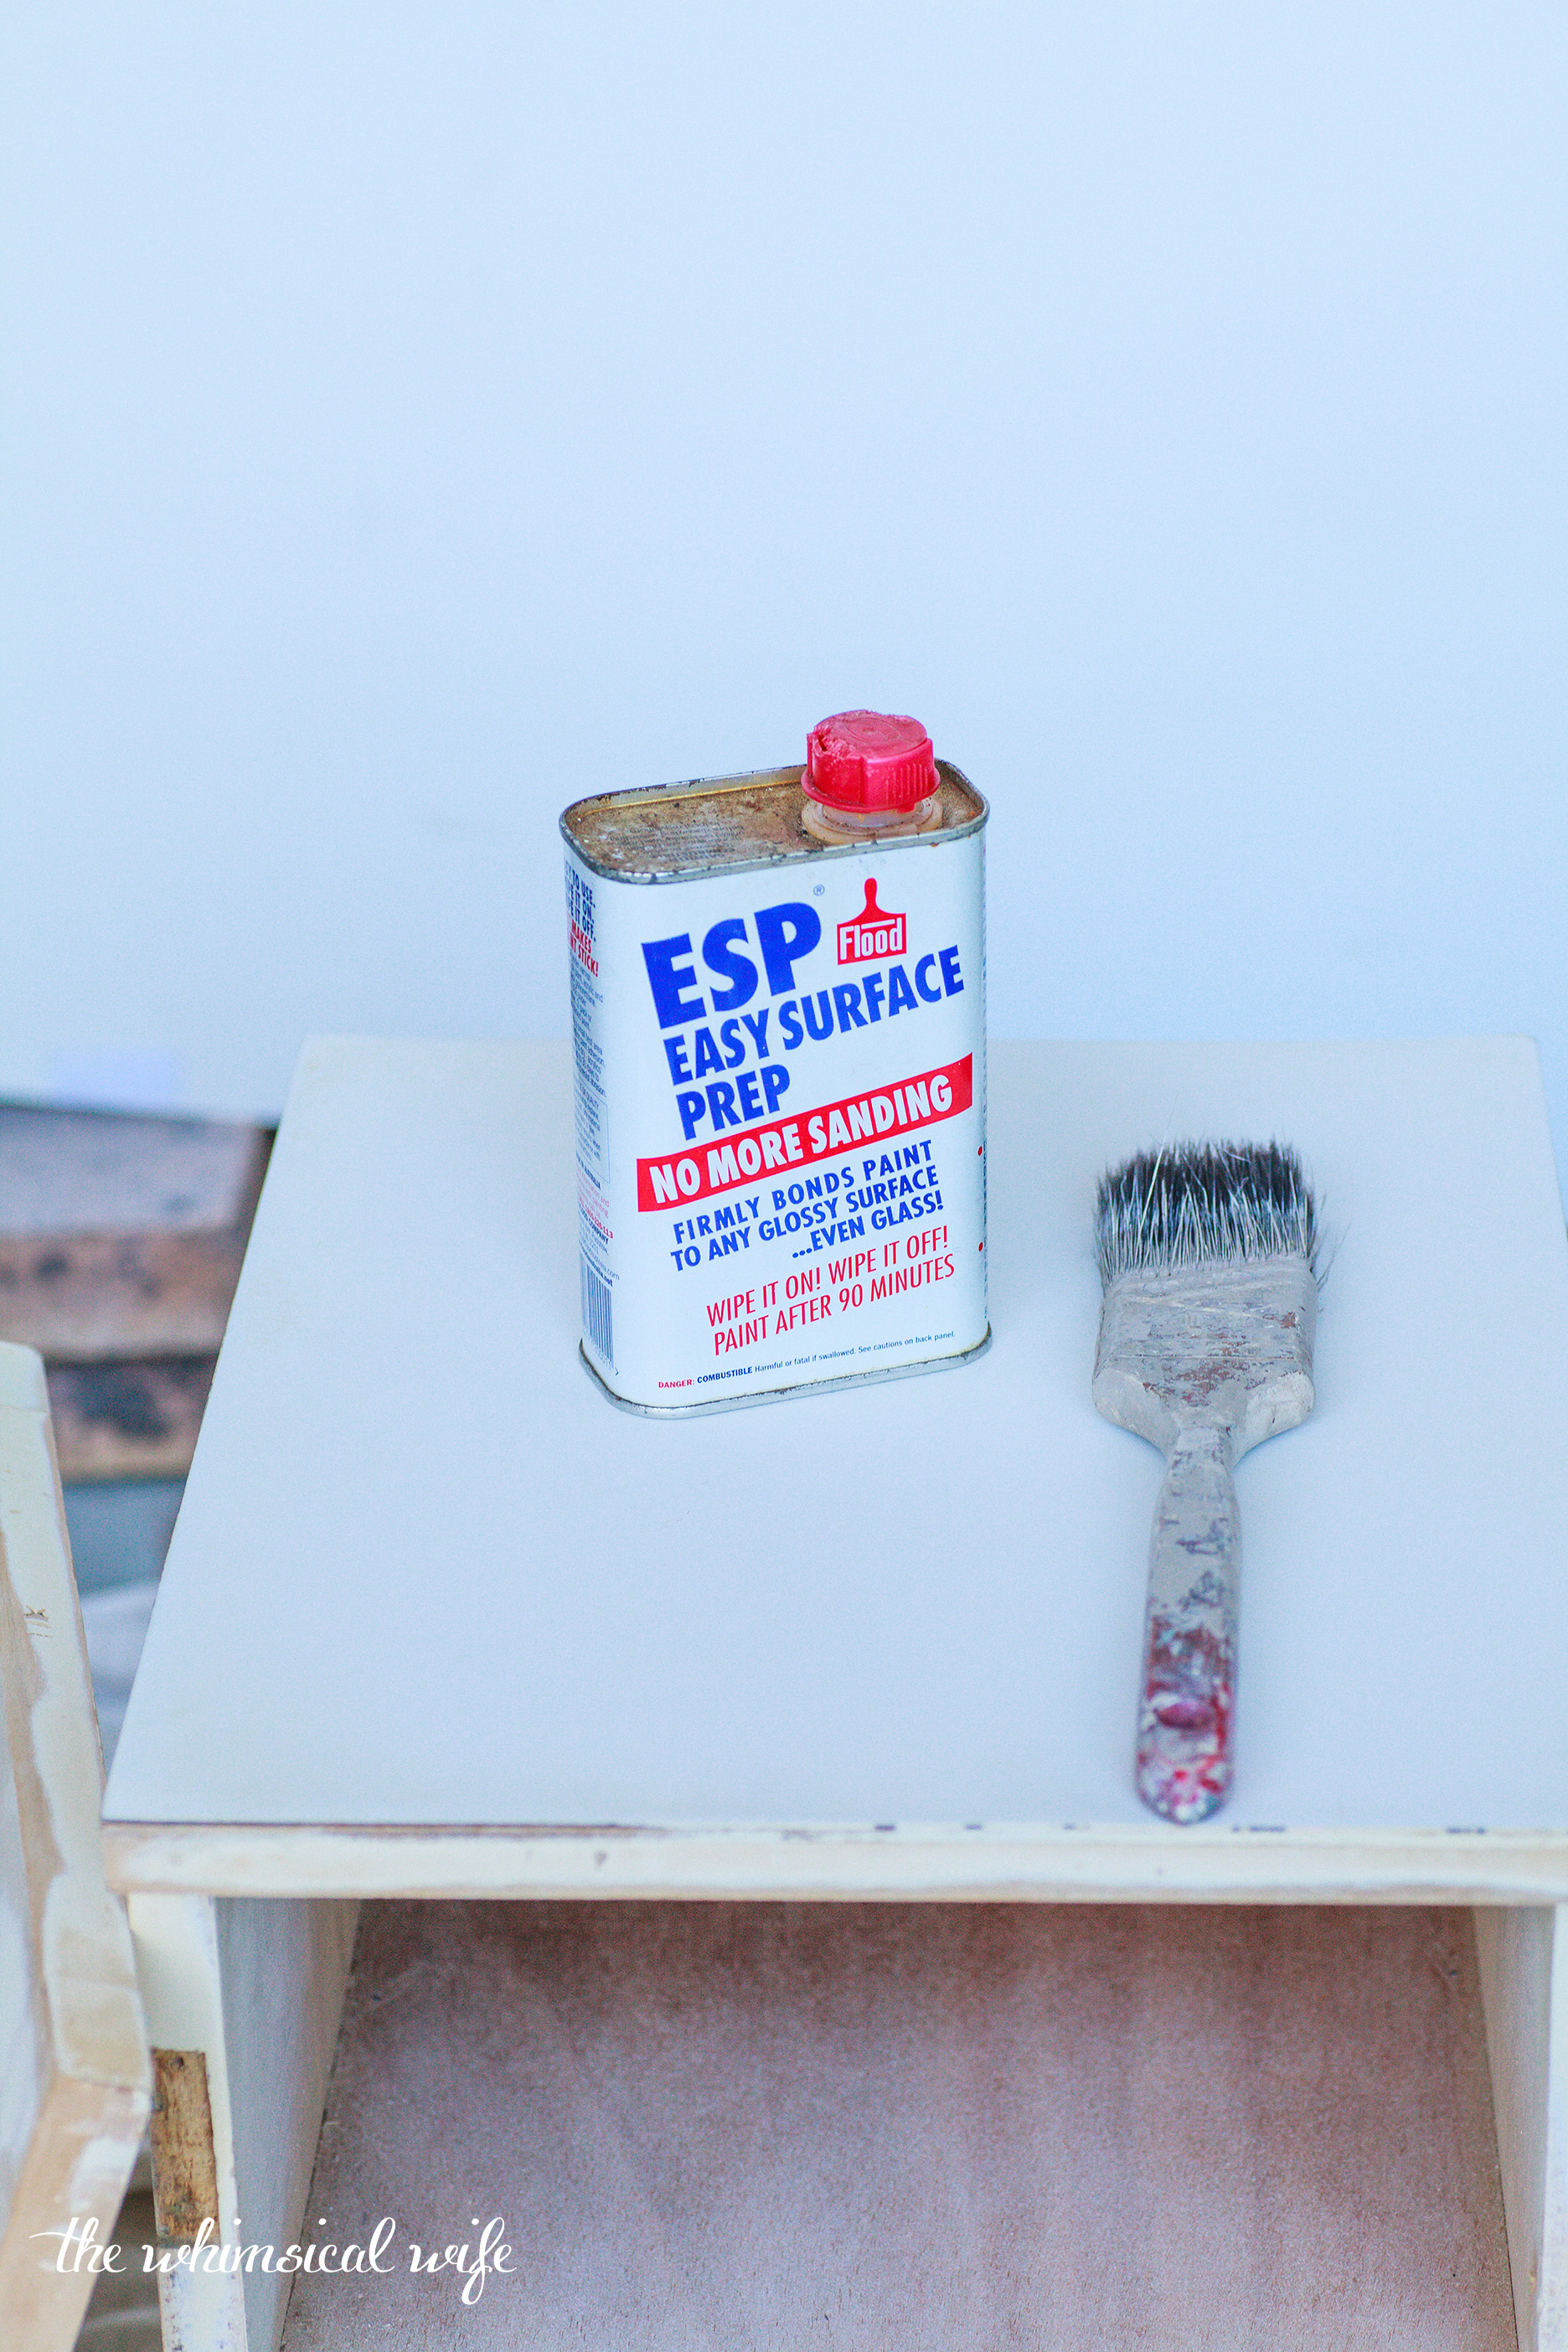
I then gave the entire piece a good sand down using an orbital sander. I generally use 120 grit sandpaper to do a basic sand in preparation for painting on most of my furniture. A quick wipe down with a wet rag to remove the excess sanding dust before applying ESP to the top surface of the cabinet. The top surface of the cabinet was laminate which was strange since the rest of it was wood. The ESP (Easy Surface Prep) is a great product to use when you want to apply paint too shiny surfaces such as this. It preps the surface so that paint will stick to it and not scratch off. I applied two coats to the surface leaving it dry in between coats. Yes I do realise it says to wipe it off but I find I get better results applying a thin coat and leaving it to dry rather than wiping it off.

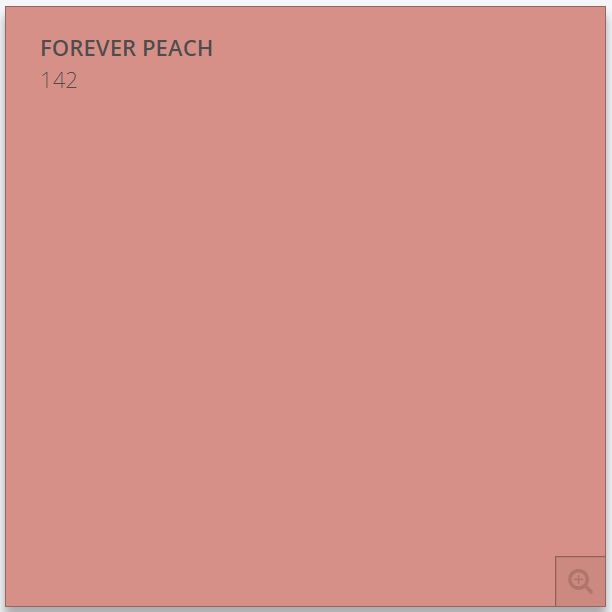
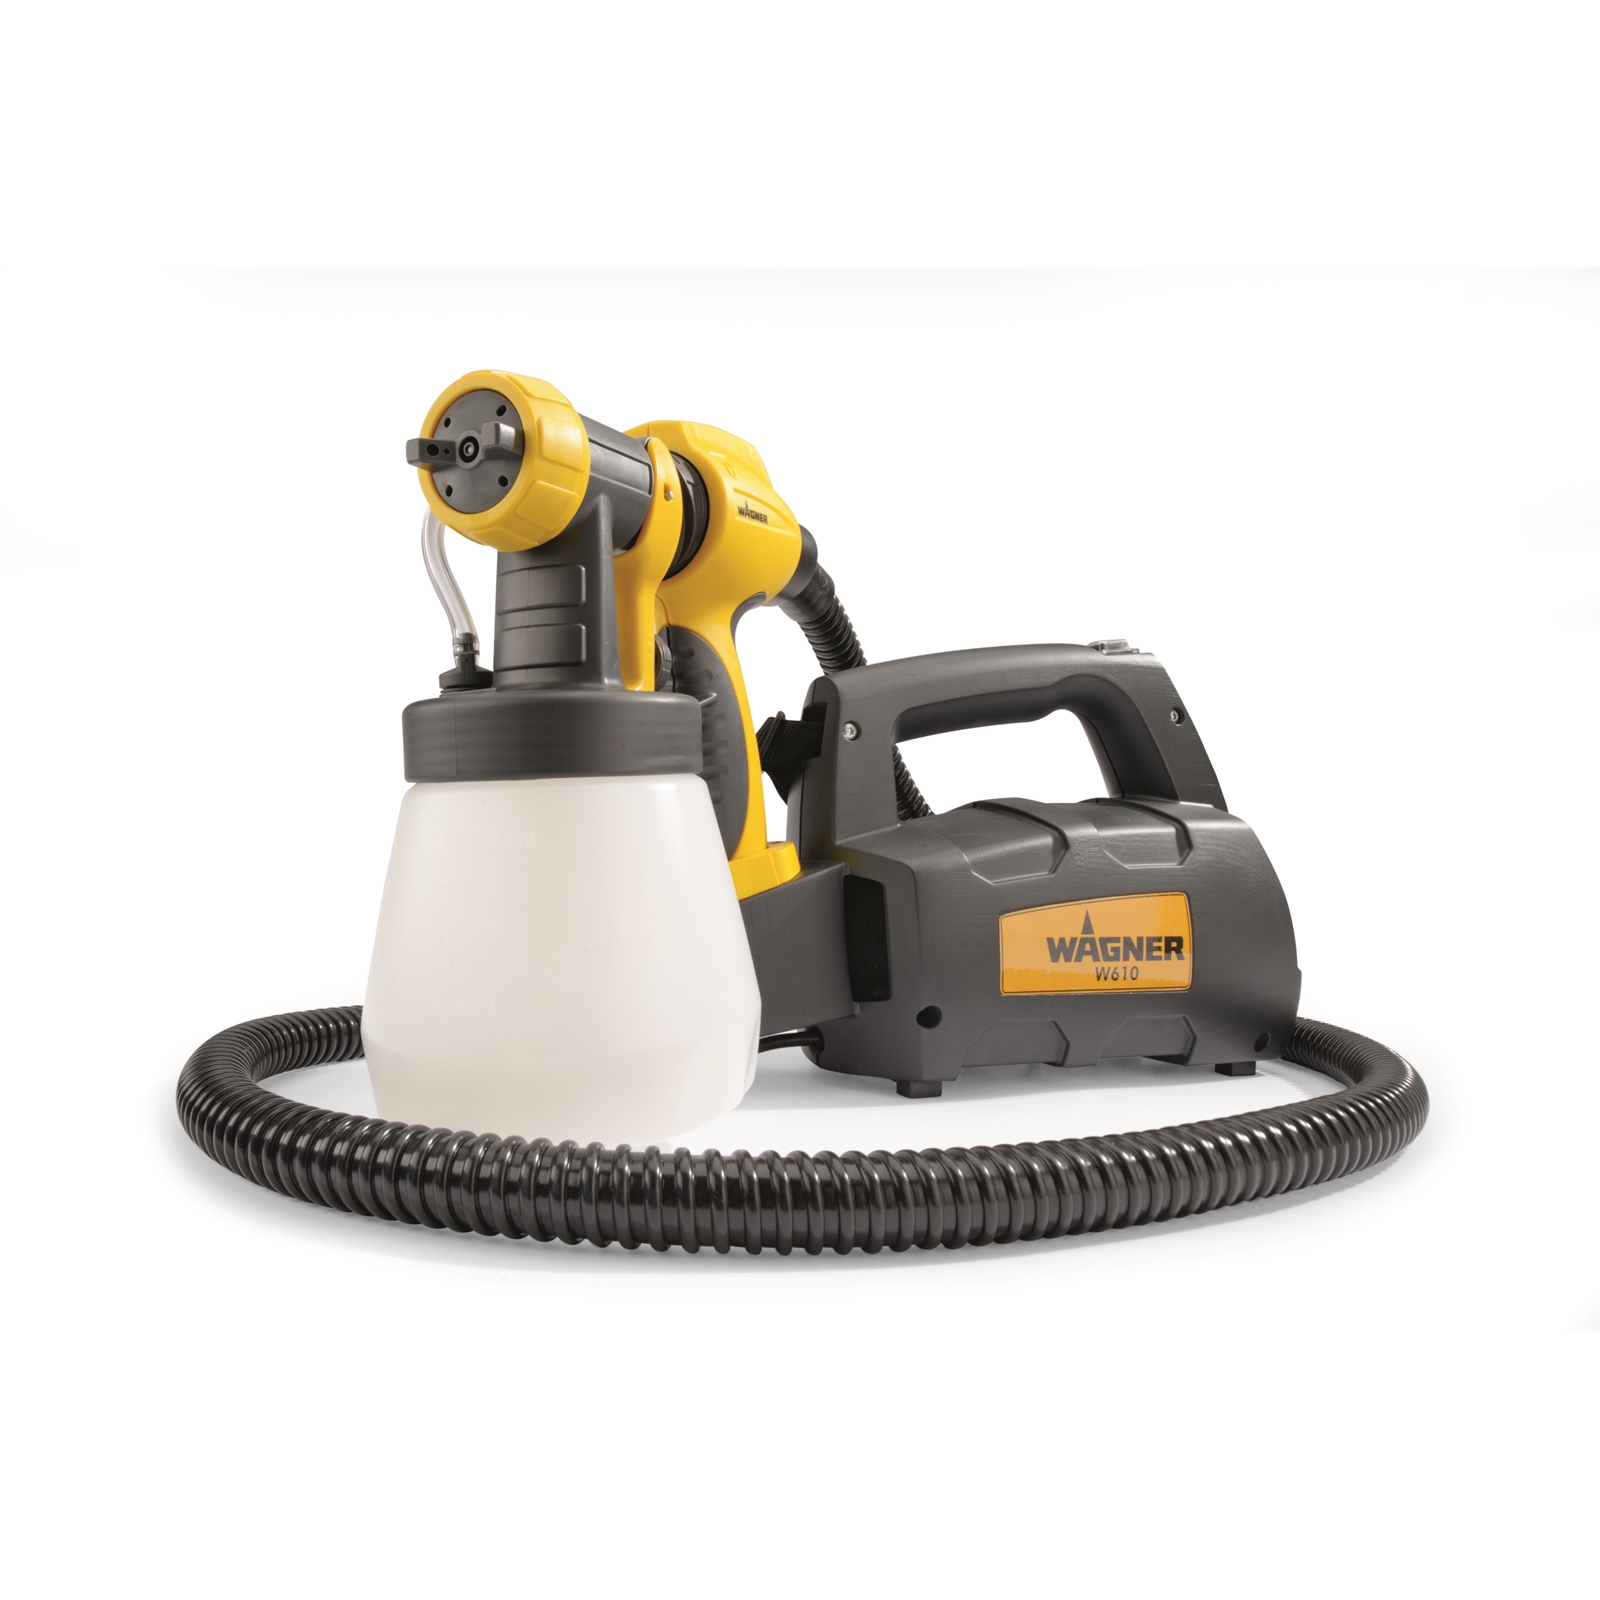
After the ESP had dried I applied a coat of primer to the cabinet before applying the top coat in Forever Peach by Bristish Paints. I use a Paint sprayer to apply all my paint as it is SO fast to do it this way. If you don't have one in your possesion simply use a foam roller to apply the paint.
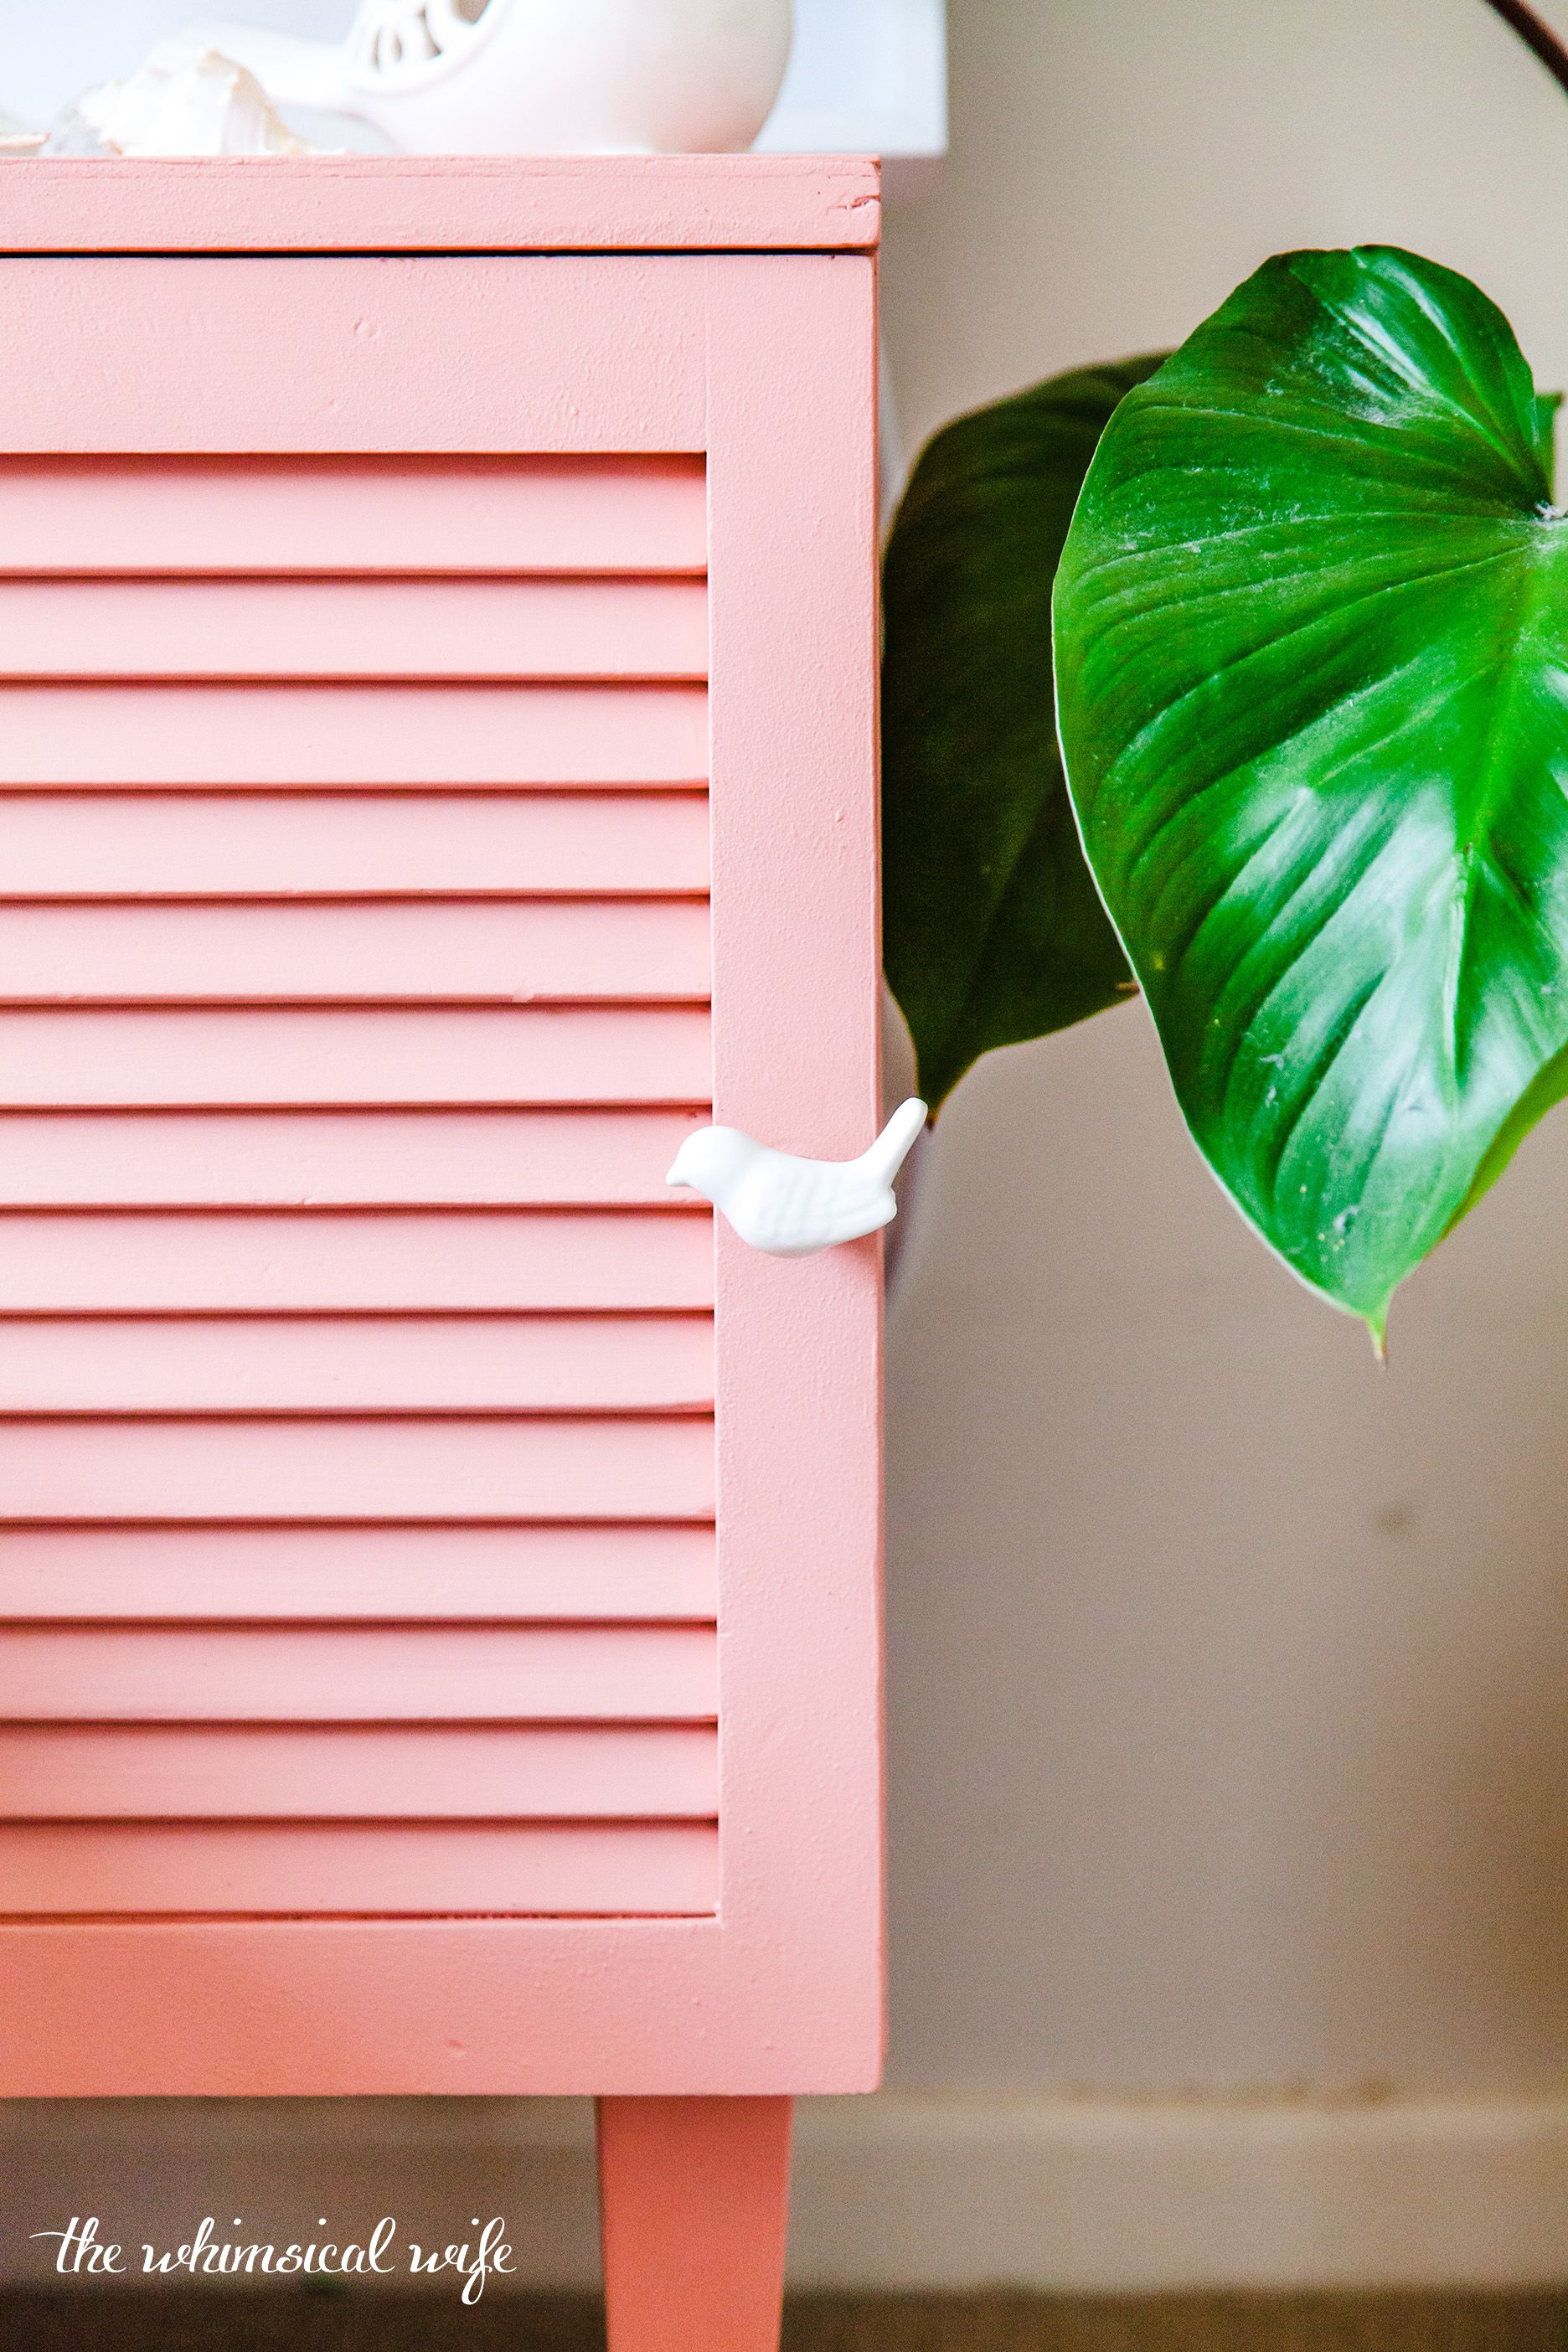
Don't you just adore this colour? It is something a little out there but so happy and cheerful and I had thoughts of selling it off to make a bit of profit on it but Miss H caught sight of it while I was putting it back together and she asked if she could have it in her room. I couldn't say no since it was so darn cute. Once everything had dried I assembled the pieces back together.
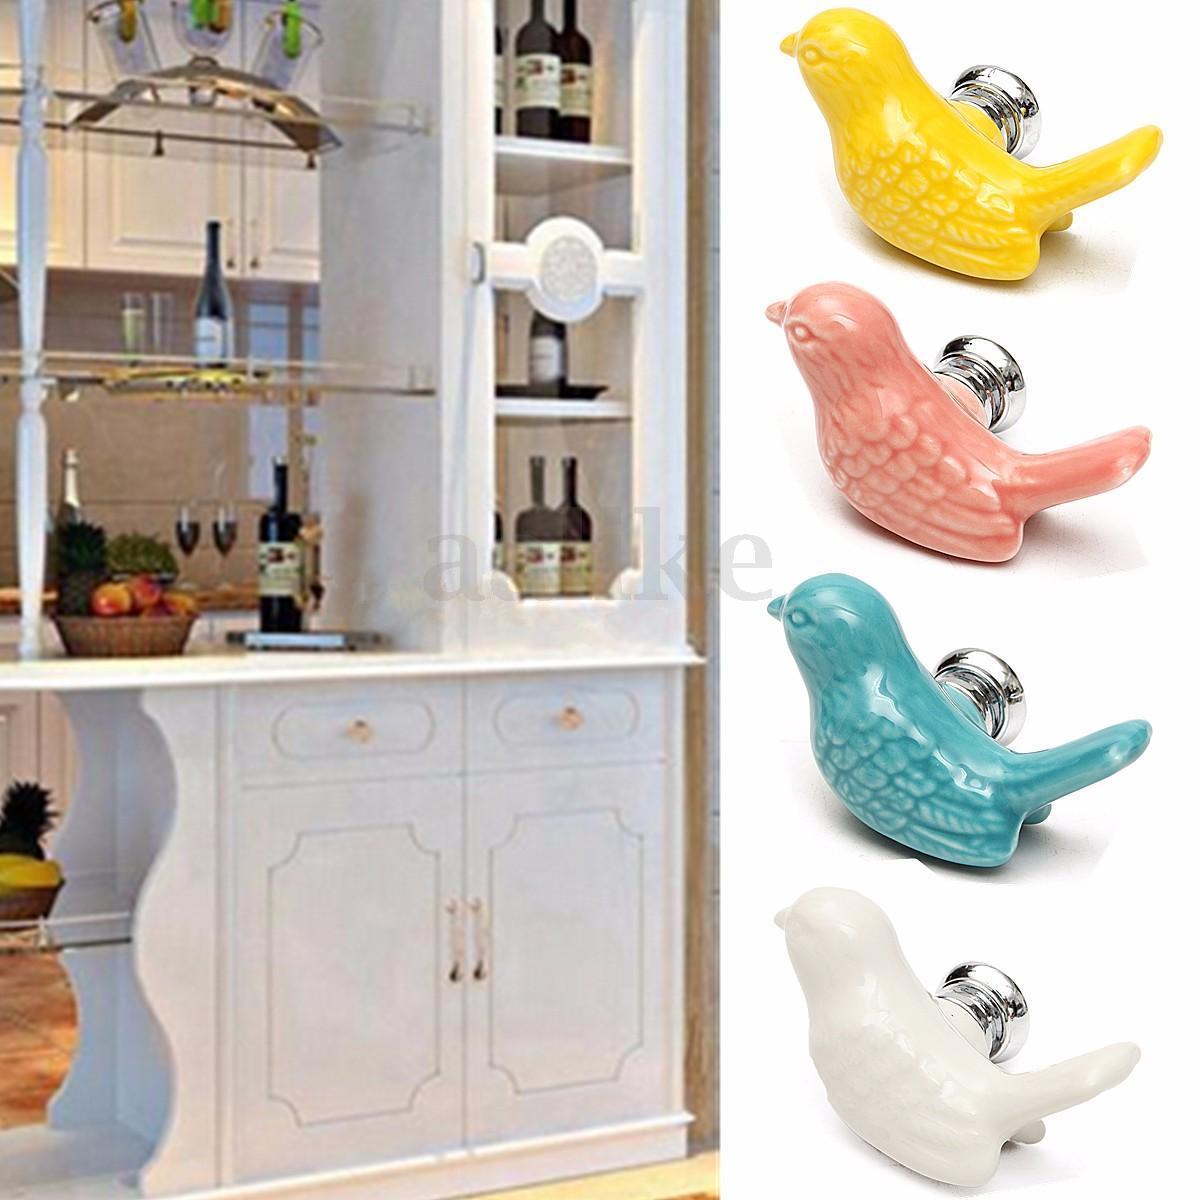
The piece-de-resistance to the cupboard is this adorable ceramic bird pull I found on eBay. I was going to go for something crystal but this little cutie popped up in my search and I couldn't say no. If you want to know more details on the products I used in this project then make sure you check out the project details at the bottom of this post.
I positioned it in Miss H's room and styled it up and boy did it look cute. You wouldn't have guessed this soft and sweet pink side table looked so drab and dreary a few days before. It didn't take long at all to give it a simple makeover and my daughter was smitten with it when I moved it in. She likes to store all her precious things inside the cupboard since Little Miss A likes to trash the kids rooms everyday and she can keep her special things out of reach. I don't know what I am going to do when Little Miss A can start opening cupboards.


I hope this cute little table gives you some inspo on what you can do with little pieces of furniture you might find along the way in your op shop travels or what you have hiding in the corners of your home. Give these pieces another look as you might have a sweet little gem hiding away in need of a little TLC.
If you want to know more about the products and tools that I used in this project click on the picture below and it will take you to the webpage with more information on the product. If you have further questions just comment below and I will get back to you as soon as I can.
Product Details: